
 Bookmark
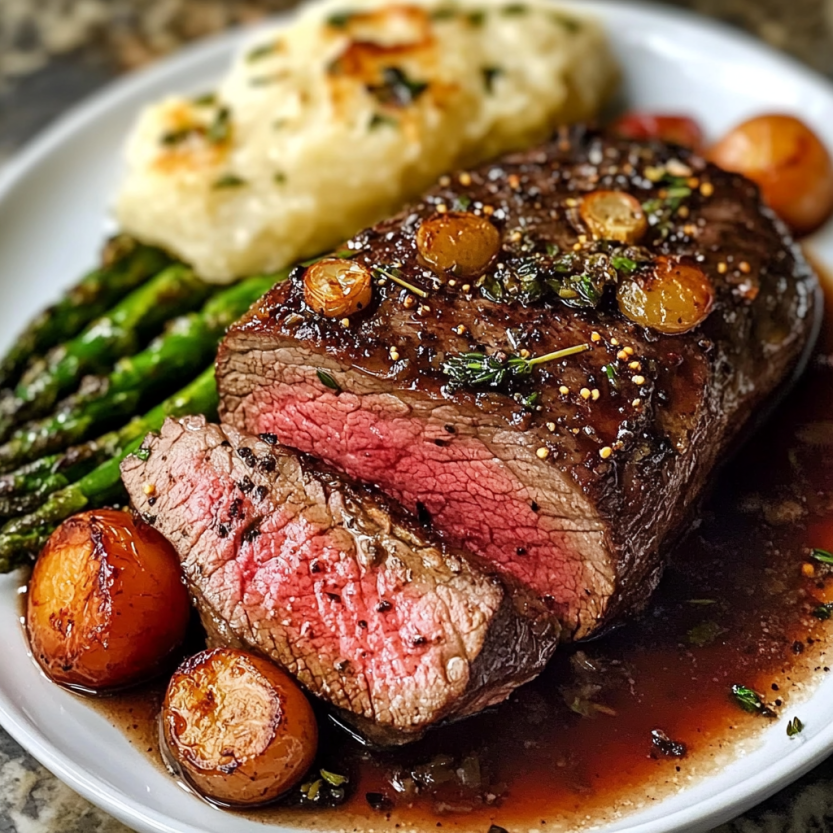
This roast beef tenderloin recipe transforms an already luxurious cut into something truly spectacular using the reverse sear method. I've perfected this technique over years of holiday dinners and special occasions, delivering consistently perfect results that will impress even the most discerning guests.
I first discovered the reverse sear method while preparing Christmas dinner three years ago. After consistently overcooking expensive beef tenderloin, this technique changed everything—now my family requests it for every celebration.
Ingredients
- Beef tenderloin: A premium cut known for exceptional tenderness and mild flavor, choose center cut if possible for the most uniform shape
- Olive oil: Helps seasonings adhere and promotes browning
- Kosher salt: Coarser than table salt; it seasons deeply without overwhelming
- Black pepper: Freshly ground provides far superior flavor
- Garlic powder: Offers consistent flavor throughout the roast
- Fresh herbs: Rosemary and thyme provide aromatic complexity; look for bright, vibrant sprigs
- Butter: Creates a rich golden crust during the final sear; use European style for higher fat content
- Whole garlic cloves: Adds depth during the final sear; select firm heads with tight skin
Step-by-Step Instructions
- Preparation:
- Remove silverskin and excess fat from the tenderloin if not already trimmed by your butcher. This improves both texture and ensures even cooking. Tie with kitchen twine at 1.5 inch intervals to create a uniform cylindrical shape that will cook evenly throughout.
- Seasoning:
- Rub the entire surface with olive oil to create a base for seasonings to adhere. Mix salt, pepper, garlic powder, and herbs together before applying generously to all sides. This dry brine not only seasons but draws moisture to the surface creating the perfect environment for an exceptional crust later.
- Dry Brining:
- Place the seasoned tenderloin uncovered in the refrigerator for at least 4 hours, ideally overnight. This crucial step allows salt to penetrate deeply while the surface dries slightly, enhancing browning capabilities. The uncovered air exposure creates a pellicle that will develop into a beautiful crust.
- Roasting:
- Position the tenderloin on a wire rack set over a baking sheet to allow air circulation around the entire roast. Cook at the low temperature of 225°F until the internal temperature reaches 120–125°F for medium rare. This slow, gentle heat ensures perfect edge to edge doneness without overcooking the exterior.
- Searing:
- Heat a cast iron skillet until smoking hot, then add butter, herbs, and garlic. The milk solids in butter brown beautifully while infusing the crust with rich flavor. Sear each side for only 1–2 minutes until deeply browned. This short, intense heat creates the perfect exterior without compromising the perfect interior temperature.
- Resting:
- Allow the tenderloin to rest for 10 minutes before slicing. During this time, the temperature will rise approximately 5 degrees while juices redistribute throughout the meat. This patience ensures each slice remains perfectly moist and no flavorful juices are lost on the cutting board.
 Bookmark
The smashed garlic cloves during searing are my secret weapon for this recipe. As they toast in the butter, they impart a mellow sweetness that complements the beef beautifully. My grandmother first taught me this trick when I was just learning to cook, and the familiar aroma instantly transports me back to her kitchen.
Perfect Temperature Guide
Understanding ideal cooking temperatures transforms your results from good to exceptional. For beef tenderloin, I recommend 120–125°F internal temperature before searing for medium rare, which will rise to 130–135°F during resting. Medium doneness requires 130–135°F before searing. Purchase a reliable instant-read thermometer, as it is the single most important tool for perfecting this recipe.
Remember that carryover cooking continues after removing the beef from heat. The final sear will raise the temperature approximately 5 degrees and resting adds another 5 degrees. Plan accordingly to achieve your preferred level of doneness without overcooking this precious cut.
For absolute precision, consider using a probe thermometer that remains in the meat throughout cooking with an external display or smartphone connection. This eliminates the need to open the oven repeatedly, which can extend cooking time and affect temperature consistency.
Make Ahead Options
While this recipe shines when made fresh, you can prepare certain elements ahead of time. Season and dry brine the tenderloin up to 24 hours in advance, kept uncovered in the refrigerator. This not only saves time but actually improves flavor development and surface texture.
You can also complete the slow roasting step up to 2 hours before serving. Simply remove the tenderloin from the oven when it reaches about 115°F instead of 120–125°F. Let it rest at room temperature, tented loosely with foil. When ready to serve, proceed with the searing step, allowing the lower starting temperature to compensate for the resting period.
For entertaining, this flexibility is invaluable, allowing you to focus on guests and side dishes while still delivering a perfectly cooked centerpiece when needed.
Serving Suggestions
Beef tenderloin deserves thoughtful accompaniments that complement without overwhelming its delicate flavor. Classic pairings include creamy horseradish sauce or a red wine reduction that elevates the meat without masking it.
For side dishes, consider roasted garlic mashed potatoes, green beans with toasted almonds, or a simple arugula salad with shaved parmesan and lemon vinaigrette. The key is balancing richness with brightness to create a memorable meal.
Slice the tenderloin into medallions approximately half inch thick just before serving. For maximum visual impact, arrange on a warmed platter garnished with the fresh herbs used in cooking. Serve on warmed plates to maintain the perfect temperature from kitchen to table.
 Bookmark
Frequently Asked Questions About Recipes
- → Why use the reverse sear method for beef tenderloin?
The reverse sear method ensures even cooking throughout the entire tenderloin with perfect edge-to-edge doneness. By cooking low and slow first, you get precise temperature control and better moisture retention, then finishing with a high-heat sear creates that desirable golden crust without overcooking the interior.
- → Can I prepare the beef tenderloin ahead of time?
Yes! In fact, it's recommended to season the tenderloin and refrigerate it uncovered for at least 4 hours or overnight. This dry-brining process not only enhances flavor but also helps develop a better crust during searing. Just remember to bring it to room temperature 45 minutes before cooking.
- → How do I know when my beef tenderloin is done?
For medium-rare (the most recommended doneness for tenderloin), remove the roast from the oven when it reaches 120-125°F (49-52°C). The temperature will rise slightly during resting and searing. Using a reliable meat thermometer inserted into the thickest part is essential for perfect results.
- → Do I need to tie the beef tenderloin?
Tying the tenderloin with kitchen twine helps create a uniform shape, which promotes even cooking. If your tenderloin is already a consistent thickness throughout, tying may be less necessary, but it generally produces better results, especially with tapered ends.
- → Why let the beef tenderloin rest before and after cooking?
Resting before cooking (bringing to room temperature) ensures more even cooking. Resting after cooking allows the juices to redistribute throughout the meat instead of running out when sliced. The 10-minute rest after searing is crucial for a juicy result.
- → What can I serve with beef tenderloin?
Beef tenderloin pairs beautifully with roasted vegetables like asparagus, brussels sprouts, or potatoes. For sides, consider creamy mashed potatoes, wild mushroom risotto, or a simple green salad. A red wine reduction sauce or horseradish cream makes an excellent accompaniment to highlight the beef's natural flavors.