
 Bookmark
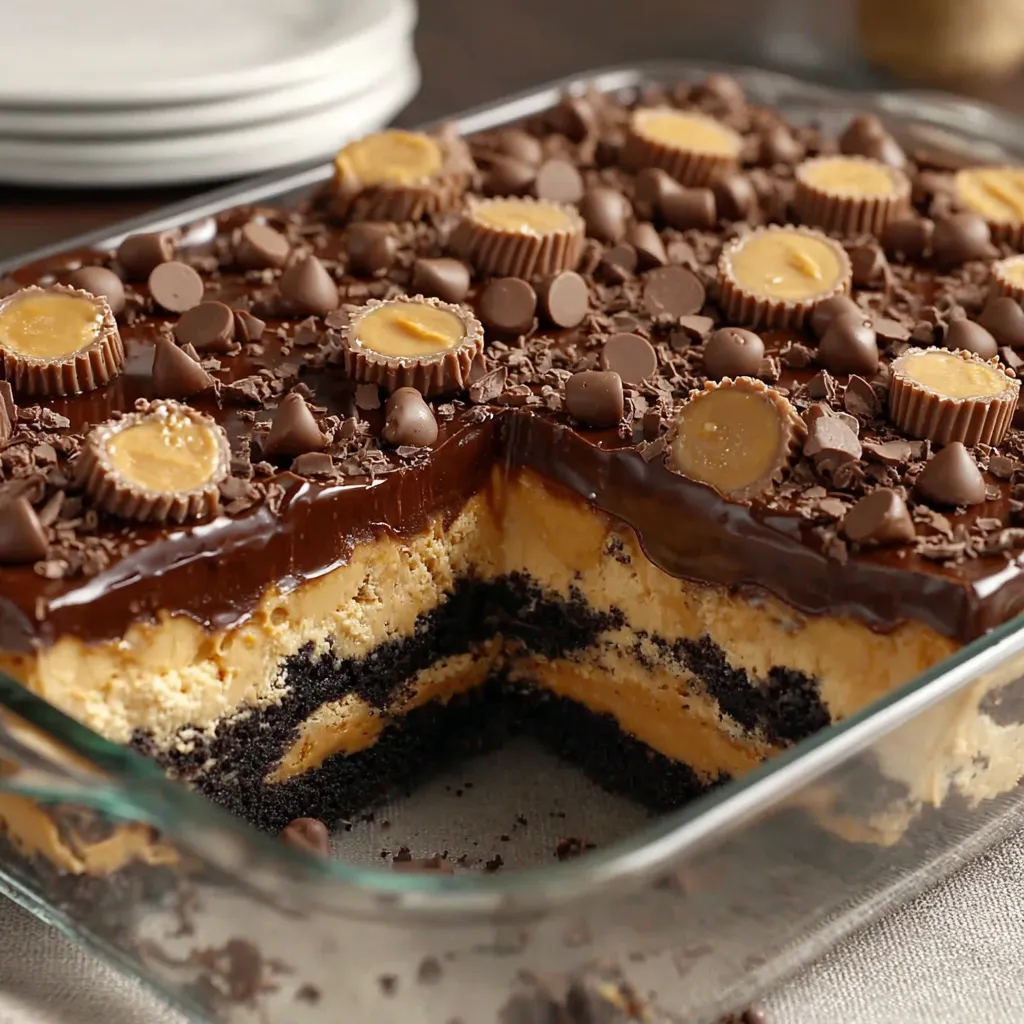
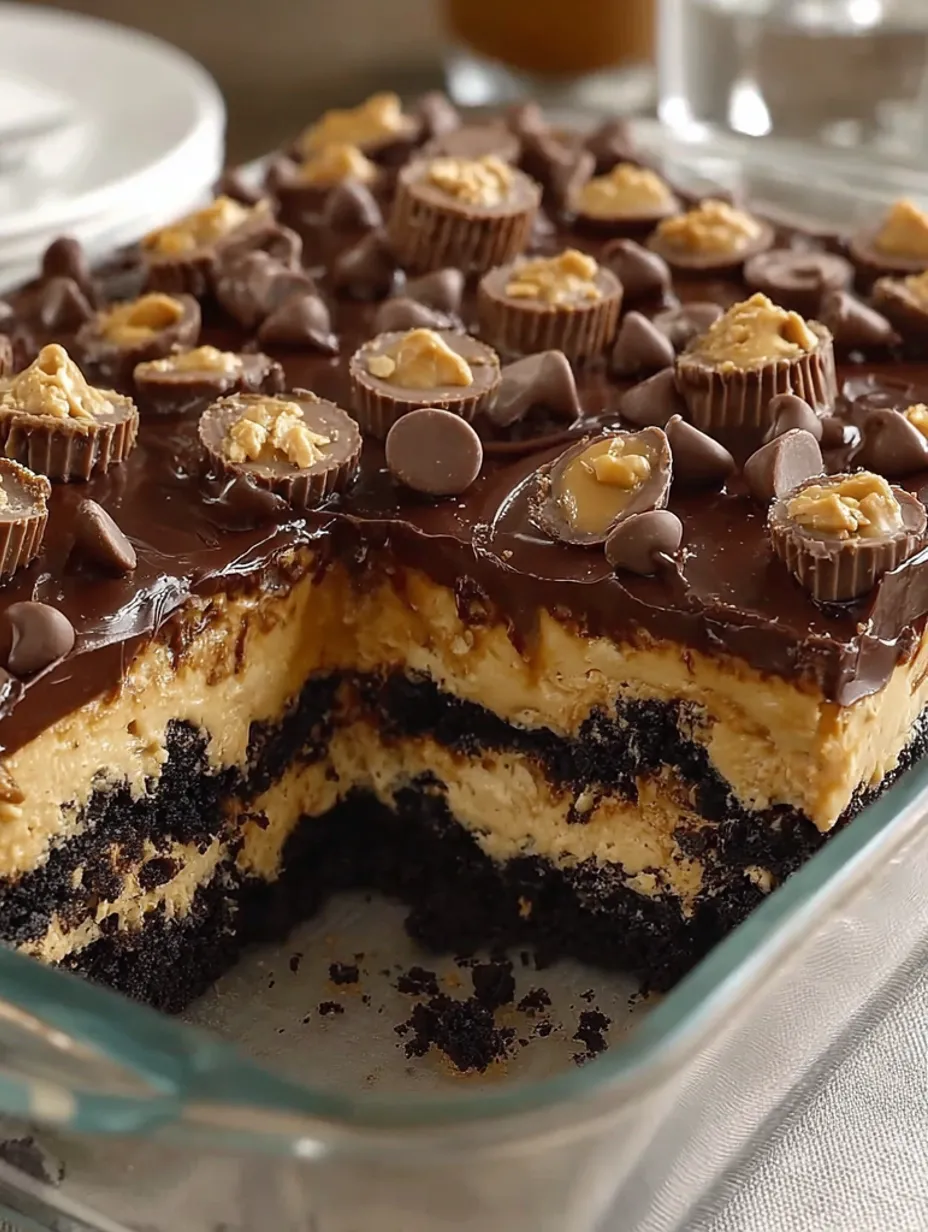
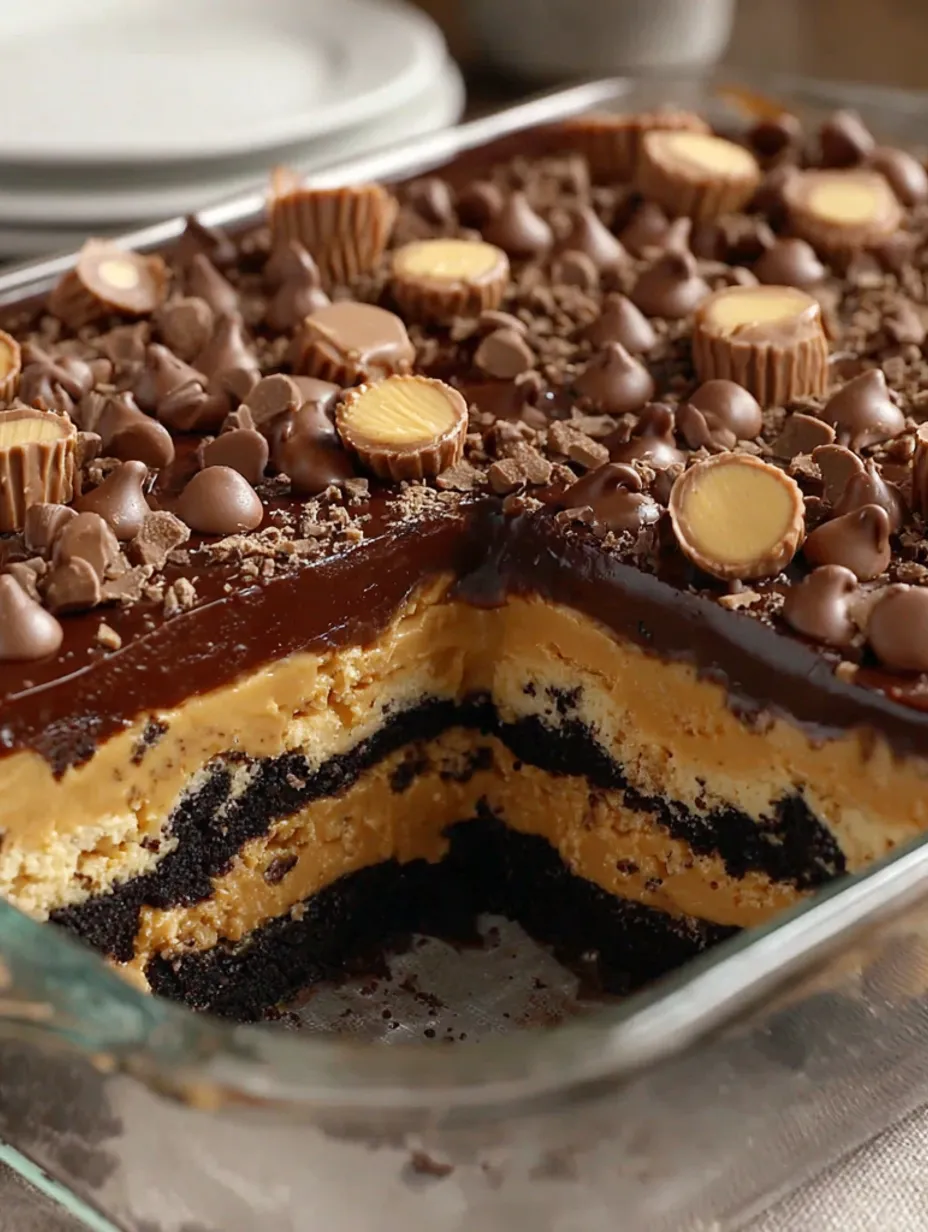
This showstopping dessert has become my go to whenever I need something that looks impressive but requires minimal skill. The name comes from its signature cracked, fractured top that forms naturally as the cream cheese filling bubbles up through the chocolate batter during baking. It's essentially a dump cake style creation that combines the best elements of brownies, cheesecake, and chocolate lava cake into one gloriously messy pan. I first made this for a potluck after seeing a photo online, and people literally stopped mid conversation when I set it on the table. The combination of rich chocolate, creamy peanut butter, and tangy cream cheese creates layers of flavor that keep everyone coming back for seconds.
I've made this cake dozens of times now for birthdays, holidays, and random Tuesday nights when I needed a mood boost. What I love most is how forgiving it is. You don't need perfect swirls or precise measurements. The whole point is controlled chaos, and somehow it always turns out beautifully cracked and delicious. My neighbor who claims she can't bake made this after I told her about it, and she texted me a photo with three exclamation points saying it was the first dessert she'd ever been proud of.
Ingredients
- 1 box 15.25 oz chocolate cake mix: serves as the foundation providing structure and deep chocolate flavor. Any brand works well though name brands tend to produce more consistent texture. You can substitute homemade chocolate cake batter if you prefer from scratch baking.
- 1 cup water: hydrates the cake mix and helps create the proper batter consistency. Use room temperature water for best mixing results.
- 1/2 cup vegetable oil: adds moisture and creates a tender crumb throughout the cake. Canola oil or melted coconut oil work as substitutes, or try unsweetened applesauce for a slightly lighter version.
- 3 large eggs: bind the ingredients together and provide structure. Room temperature eggs incorporate more smoothly into the batter than cold ones straight from the fridge.
- 8 oz cream cheese softened: is crucial for the signature swirled layer. Full fat cream cheese is strongly recommended as low fat versions don't provide the same rich tangy flavor or creamy texture. Let it sit at room temperature for at least 30 minutes before using.
- 1/2 cup powdered sugar: sweetens the cream cheese mixture without adding graininess. Confectioners sugar dissolves instantly creating a smooth filling.
- 1/2 cup creamy or crunchy peanut butter: brings nutty richness and pairs perfectly with chocolate. Creamy creates smooth swirls while crunchy adds textural interest with little peanut pieces throughout. Standard processed peanut butter works best as natural varieties can be too oily and runny.
- 1 tsp vanilla extract: enhances all the other flavors and adds warmth to the cream cheese layer. Pure vanilla extract gives better flavor than imitation.
- 1 cup chocolate chips semi sweet or milk chocolate: melts slightly during baking creating pockets of gooey chocolate throughout the top. You can use peanut butter chips or white chocolate chips for variety.
- 1/2 cup chopped pecans or walnuts optional: adds crunchy contrast to the soft cake. Toast them lightly first for deeper flavor, or omit entirely for nut free needs.
Step by Step Instructions
- Preheat and Prepare the Pan:
- Set your oven to 350°F and let it preheat for at least 10 minutes to ensure even temperature throughout. While it heats, thoroughly grease a 9x13 inch baking pan with butter or nonstick spray, then dust it lightly with flour, tapping out any excess. This prevents sticking and makes cleanup much easier later. You can also line the pan with parchment paper if you want to lift the whole cake out for cleaner slicing.
- Mix the Chocolate Batter:
- In a large mixing bowl, combine the chocolate cake mix, water, vegetable oil, and eggs. Follow the specific mixing instructions on your cake mix box, typically beating with an electric mixer on medium speed for about 2 minutes until the batter is smooth and well combined with no dry pockets of mix remaining. The batter should be thick but pourable, coating the back of a spoon. Once mixed, pour exactly half of this batter into your prepared pan, using a spatula to spread it evenly across the bottom. Set the bowl with the remaining batter aside.
- Create the Cream Cheese Swirl:
- In a separate medium bowl, add the softened cream cheese. Using an electric mixer or a sturdy wooden spoon, beat the cream cheese for about 30 seconds to smooth out any lumps. Add the powdered sugar, peanut butter, and vanilla extract. Beat everything together on medium speed for 1 to 2 minutes until the mixture is completely smooth, creamy, and fluffy with no streaks of unmixed cream cheese visible. The consistency should be thick but spreadable, similar to frosting. If it seems too stiff, the cream cheese probably wasn't soft enough to start.
- Layer and Create the Earthquake Effect:
- Using a large spoon, drop generous dollops of the cream cheese mixture randomly over the chocolate batter in the pan. Space them out somewhat evenly but don't worry about perfection. Take a butter knife and gently swirl the cream cheese into the chocolate batter using just a few strokes. The key here is restraint. You want visible chunks and swirls of cream cheese, not a fully blended mixture. Two or three sweeping figure eight motions through the pan is plenty. Over mixing will prevent the dramatic cracked top from forming properly. Once you've done your minimal swirling, pour the remaining chocolate batter over the top, letting it flow naturally to cover most of the cream cheese layer. Don't spread it perfectly smooth. The uneven coverage actually helps create those characteristic cracks.
- Add the Toppings:
- Sprinkle the chocolate chips evenly over the entire surface of the batter. If you're using chopped nuts, scatter them over the chocolate chips now. The chips will sink slightly during baking and create pockets of melted chocolate throughout the finished cake.
- Bake Until Cracked and Set:
- Place the pan in your preheated oven and bake for 35 to 40 minutes. You'll know it's ready when the top has cracked dramatically and looks almost dried out in spots while still appearing slightly soft in others. Insert a toothpick into the center and it should come out with a few moist crumbs clinging to it. If it comes out completely clean, you've slightly overbaked it, though it will still taste good. If it comes out with wet batter, give it another 3 to 5 minutes. The cream cheese layer will bubble up through the cracks creating that signature earthquake appearance.
- Cool Before Serving:
- Remove the pan from the oven and set it on a wire cooling rack. Let the cake rest in the pan for at least 10 to 15 minutes before cutting into it. This cooling time allows the cream cheese layer to set slightly so it doesn't ooze out completely when you slice it. That said, this cake is absolutely delicious served warm when the chocolate chips are still melty and the cream cheese is soft and gooey.
 Bookmark
What fascinates me most about this cake is the chemistry happening in the oven. As the batter heats, the cream cheese layer becomes less dense than the chocolate batter surrounding it, causing it to rise and push through creating those gorgeous cracks. It's like a science experiment you can eat. I've learned through trial and error that the less you swirl, the more dramatic the final appearance. My kids love watching through the oven door as the surface starts to crack and bubble, though I have to remind them not to open the door or the temperature drop can affect the rising.
Storage and Make Ahead Tips
This cake stores beautifully at room temperature for up to 2 days if kept covered with plastic wrap or foil. The texture stays perfectly moist without needing refrigeration during this time. For longer storage, transfer it to the refrigerator where it will keep for up to 5 days in an airtight container. The cold actually makes the cream cheese layer firmer and creates a different but equally delicious texture. You can also freeze individual slices wrapped tightly in plastic wrap and then placed in a freezer bag for up to 1 month. When you want a piece, just thaw it at room temperature for about an hour or microwave it for 15 to 20 seconds to warm it through. I actually prefer making this cake a day ahead for parties because the flavors develop and intensify overnight.
Creative Variations Worth Trying
The basic version is fantastic, but this cake is endlessly adaptable. For an over the top Reese's version, chop up 6 to 8 Reese's peanut butter cups and scatter them between the layers along with the cream cheese mixture. If you want something fudgier and denser, swap the chocolate cake mix for a boxed brownie mix using the same layering technique. For gluten free needs, use a certified gluten free chocolate cake mix and make sure your chocolate chips are also labeled gluten free. Dairy free folks can use plant based cream cheese alternatives and dairy free chocolate chips, though the texture will be slightly different. One of my favorite tweaks is using a brownie base with crunchy peanut butter in the cream cheese layer, then drizzling the whole thing with salted caramel sauce after it comes out of the oven.
Serving Suggestions
 Bookmark
This cake is incredibly rich, so I like serving it with something that cuts through the sweetness. A scoop of vanilla ice cream on a warm slice is classic and wonderful. The cold ice cream melting into the warm chocolate and peanut butter is absolute perfection. For extra indulgence, drizzle warm chocolate sauce or peanut butter sauce over each slice just before serving. A light dusting of powdered sugar on top makes it look bakery ready for special occasions. I've also served it alongside fresh berries which provide a tart contrast to the rich chocolate. For casual gatherings, I cut it into smaller squares so people can grab a bite without committing to a full slice. It pairs beautifully with coffee or cold milk.
Frequently Asked Questions About Recipes
- → Can I use natural peanut butter in this cake?
Yes, but natural peanut butter has a thinner consistency due to oil separation, which may make the cream cheese layer runnier. Stir it thoroughly before measuring and using. Traditional processed peanut butter produces more consistent results.
- → How do I make the cake more gooey?
Reduce the baking time by 3 to 5 minutes and remove when a toothpick shows moist crumbs rather than coming out clean. Using full-fat cream cheese and adding an extra tablespoon of peanut butter to the cream cheese mixture also enhances the gooey texture.
- → Can I make Peanut Butter Earthquake Cake ahead of time?
Absolutely. Bake it a day in advance and store covered in the refrigerator. Let it come to room temperature before serving, or warm individual slices in the microwave for 15 to 20 seconds to restore the gooey texture.
- → What's the difference between Earthquake Cake and dump cake?
While both use simple layering techniques, earthquake cakes include a cream cheese swirl that bubbles up during baking to create the characteristic cracked surface. Dump cakes are typically simpler with dry cake mix sprinkled over fruit filling without the marbled cream cheese effect.
- → How long does Peanut Butter Earthquake Cake last?
When stored in an airtight container in the refrigerator, the cake stays fresh for up to 5 days. You can also freeze individual slices wrapped tightly in plastic wrap for up to 1 month.
- → Can I make this cake gluten-free?
Yes, substitute the regular chocolate cake mix with a certified gluten-free chocolate cake mix and ensure your chocolate chips are also gluten-free. The rest of the ingredients are naturally gluten-free.
- → Why is my cream cheese layer not swirling properly?
The cream cheese must be fully softened to room temperature before mixing. Cold cream cheese is too stiff to swirl and won't create the proper marbled effect. Let it sit out for at least 30 minutes before starting.