
 Bookmark
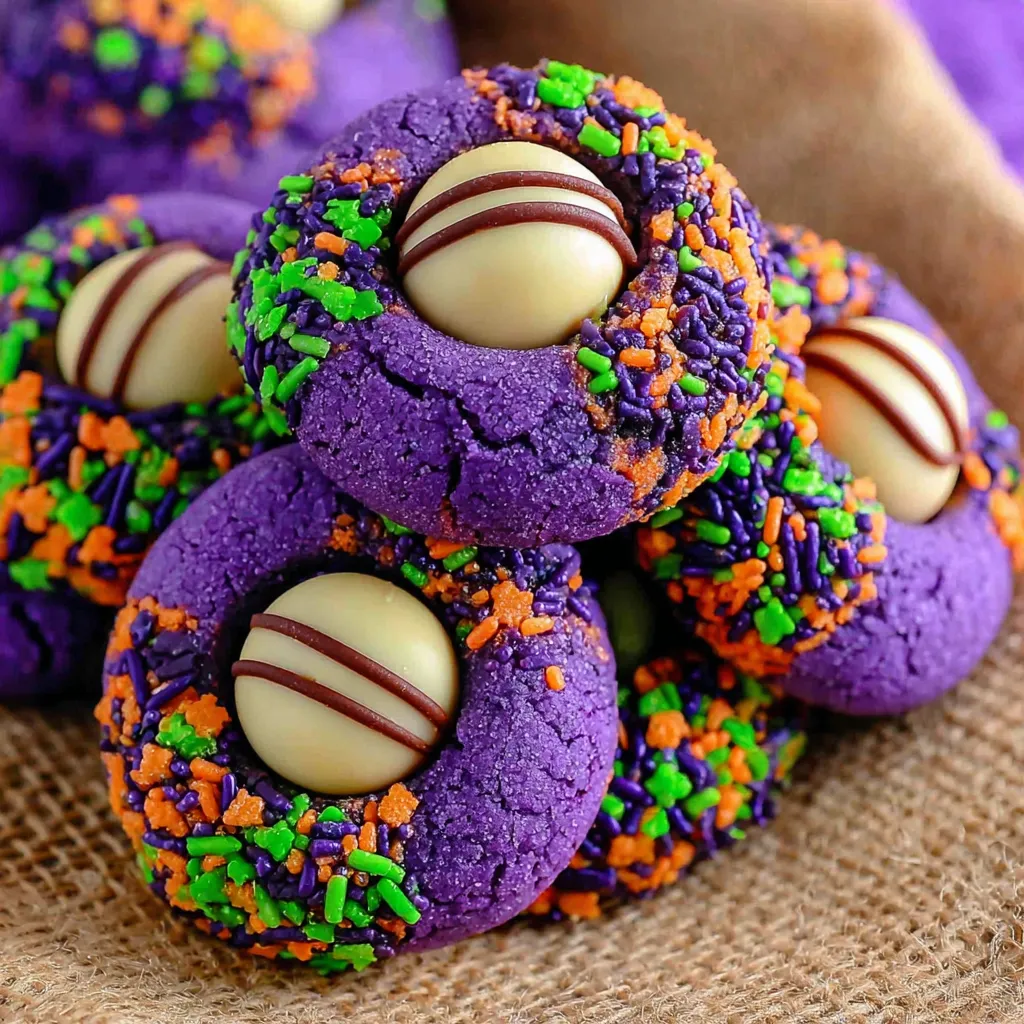
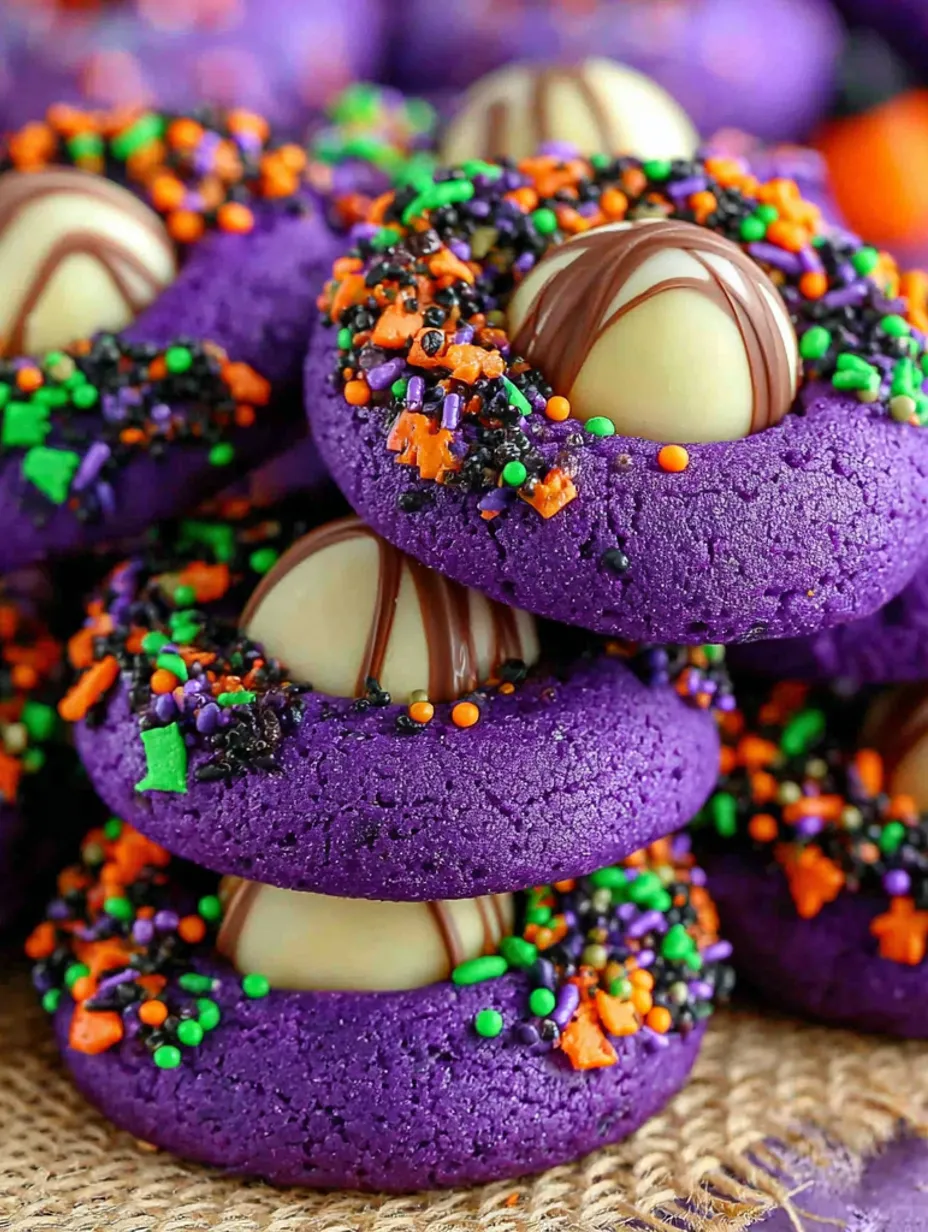
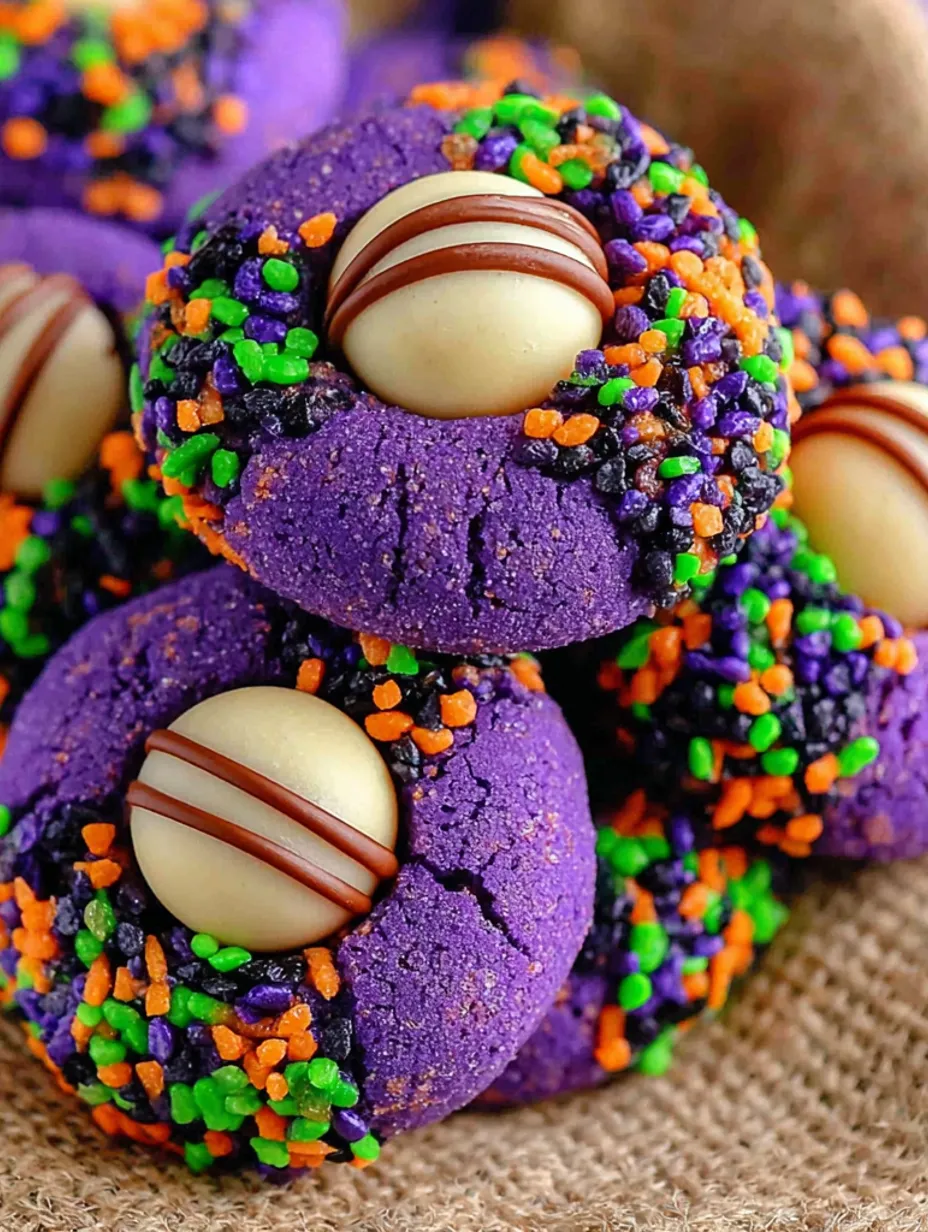
These whimsical Witch Hat Halloween Cookies transform my beloved peanut butter blossoms into spooky seasonal treats that have become the star of every Halloween party I host. The vibrant purple dough topped with chocolate kisses creates the perfect witch hat silhouette while delivering that classic peanut butter cookie flavor everyone craves.
I discovered this recipe three years ago when my daughter wanted to help make Halloween treats for her class party. We had such a blast rolling the purple dough in sparkly sugar that it became our annual Halloween tradition. Now my kids start asking about witch hat cookies as soon as October arrives.
Ingredients
- All purpose flour: spooned and leveled ensures proper texture without dense cookies
- Cornstarch: creates that signature soft chewy center that keeps these cookies from getting too crispy
- Baking soda and baking powder: work together to give the perfect lift and tender crumb
- Fine salt: enhances the peanut butter flavor without making cookies taste salty
- Unsalted butter: at room temperature creams properly with sugar for ideal texture
- Creamy peanut butter: serves as the flavor star so choose a brand you love eating straight from the jar
- Granulated sugar: provides sweetness and helps create those lovely crackled tops
- Room temperature egg: incorporates smoothly and helps bind everything together
- Pure vanilla extract: adds depth and rounds out the peanut butter beautifully
- Purple gel food coloring: creates vibrant color that holds up against the brown peanut butter base
- Purple sanding sugar or Halloween sprinkles: give that magical sparkly coating
- Hershey's Kisses or Hugs: become the pointed witch hat tops
Step by Step Instructions
- Prepare the Dry Mix:
- Whisk together flour, cornstarch, baking soda, baking powder, and salt in a medium bowl until evenly distributed. This ensures every bite has the right balance of leavening and prevents any pockets of baking soda.
- Cream Butter and Sugar:
- Beat room temperature butter with granulated sugar using an electric mixer for 3 to 4 minutes until the mixture looks light and fluffy. Properly creamed butter creates air pockets that give cookies their tender texture.
- Add Wet Ingredients:
- Mix in the room temperature egg and vanilla extract until completely combined. Add the peanut butter and beat until the mixture is smooth and uniform throughout.
- Incorporate Dry Ingredients:
- Add the flour mixture to the wet ingredients and mix on low speed just until combined. Overmixing develops gluten which makes cookies tough so stop as soon as you no longer see flour streaks.
- Color the Dough:
- Stir in purple gel food coloring until you achieve your desired shade. Since peanut butter is naturally brown you need saturated gel coloring to get vibrant purple. I usually add coloring gradually until I love the color.
- Chill for Easy Handling:
- Cover the dough and refrigerate for at least 30 minutes. Chilled dough is much easier to roll into balls and helps cookies hold their shape during baking.
- Prepare for Baking:
- Preheat your oven to 350 degrees F and line baking sheets with parchment paper. Unwrap your chocolate kisses now so they're ready to press into hot cookies immediately after baking.
- Shape and Coat:
- Roll chilled dough into 1 inch balls then roll each ball in purple sanding sugar or sprinkles until completely coated. The sugar creates that beautiful sparkly exterior.
- Bake Until Set:
- Place dough balls 2 inches apart on prepared baking sheets and bake for 8 to 10 minutes until edges are just set. Don't overbake or cookies will be dry.
- Add Chocolate Tops:
- Immediately press one chocolate kiss or hug into the center of each hot cookie. The residual heat will slightly melt the bottom of the chocolate helping it stick.
- Set the Chocolate:
- Place the entire baking sheet in the freezer for 10 minutes to quickly firm up the chocolate pieces so they don't slide off when you move the cookies.
- Cool Completely:
- Transfer cookies to a wire cooling rack and let them cool completely before storing. The chocolate needs to be fully set for best results.
 Bookmark
My secret ingredient is definitely the cornstarch which I learned from years of cookie baking experiments. It creates that perfect chewy texture that makes these cookies irresistible. I also love how this recipe brings my whole family into the kitchen because even my youngest can help roll dough balls and press in the chocolate.
Storage and Make Ahead Tips
Store finished cookies in an airtight container at room temperature for up to 4 days. After that the texture starts to decline though they're still edible. You can make the dough up to 48 hours ahead and keep it chilled until ready to bake. Just let it sit out for 30 minutes to soften slightly before shaping.
For longer storage freeze baked cookies in airtight containers with parchment between layers for up to 2 months. The chocolate needs to be completely hard before freezing. You can also freeze shaped dough balls on baking sheets then transfer to freezer bags for up to 3 months.
Ingredient Substitutions
While I recommend sticking with regular creamy peanut butter for best results I've had great success with Skippy Naturals which actually gives even better peanut flavor. Avoid natural peanut butters that separate as they can make cookies greasy.
You can substitute any color gel food coloring to match your theme. Orange and green work beautifully for Halloween or try red for Valentine's Day witch hats. Just remember darker colors show up better against the peanut butter base.
Serving Suggestions
These cookies are perfect for Halloween parties, school treats, or gift giving. I like to arrange them on a platter with other Halloween treats or pack them in clear bags tied with orange ribbon for trick or treaters. They're also wonderful with a glass of cold milk or hot apple cider.
 Bookmark
Frequently Asked Questions About Recipes
- → How do I get the purple color to show up well against the peanut butter?
Since peanut butter has a brown base, use saturated gel food coloring rather than liquid coloring. Purple or violet gel coloring works best and creates vibrant results that show beautifully against the natural peanut butter tone.
- → What's the best way to make the sprinkles stick to the cookie dough?
Roll the chilled cookie dough balls while they're still slightly tacky from refrigeration. Small sprinkles work better than large ones, but purple sanding sugar adheres most easily and creates the smoothest coating.
- → When should I press the chocolate kisses into the cookies?
Press the Hershey's Kisses or Hugs into the cookies immediately after removing them from the oven while they're still hot. Have the chocolates unwrapped and ready to go for quick application.
- → Can I make these cookies ahead of time for a Halloween party?
Yes, these cookies store beautifully for up to 4 days in an airtight container at room temperature. You can also prepare the dough up to 48 hours in advance and chill until ready to bake.
- → What makes these cookies stay soft and chewy?
The secret ingredient is cornstarch, which creates a tender, chewy texture. Combined with room temperature butter and proper chilling time, this ensures the cookies maintain their soft consistency.
- → Can I use different colors besides purple for these witch hat cookies?
Absolutely! Green or orange gel food coloring work wonderfully for Halloween themes. The technique remains the same regardless of color choice, just adjust the food coloring to achieve your desired shade.