
 Bookmark
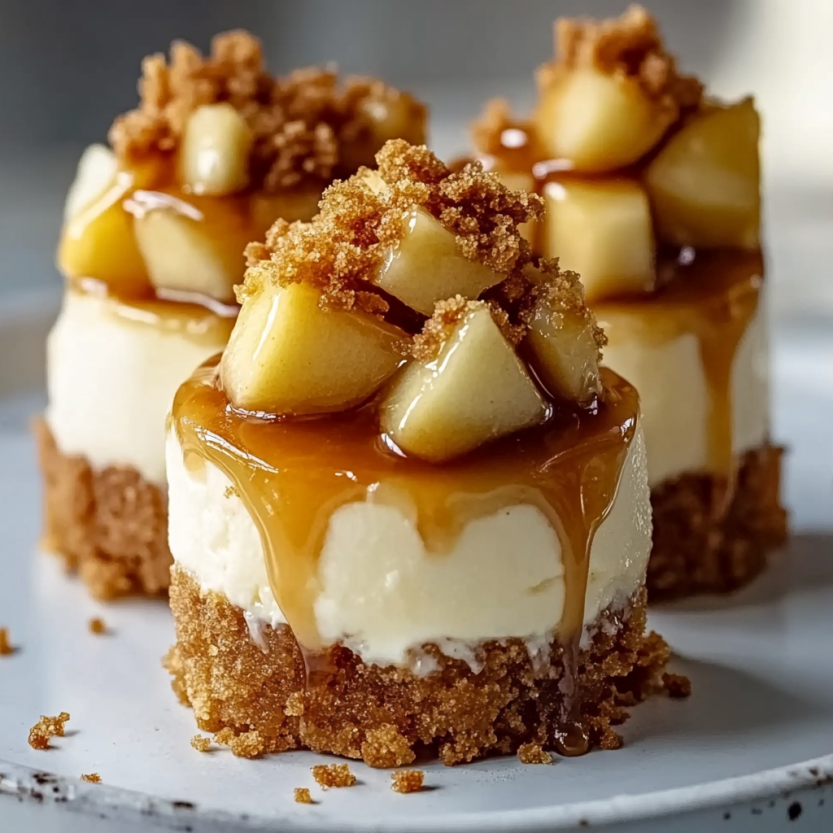
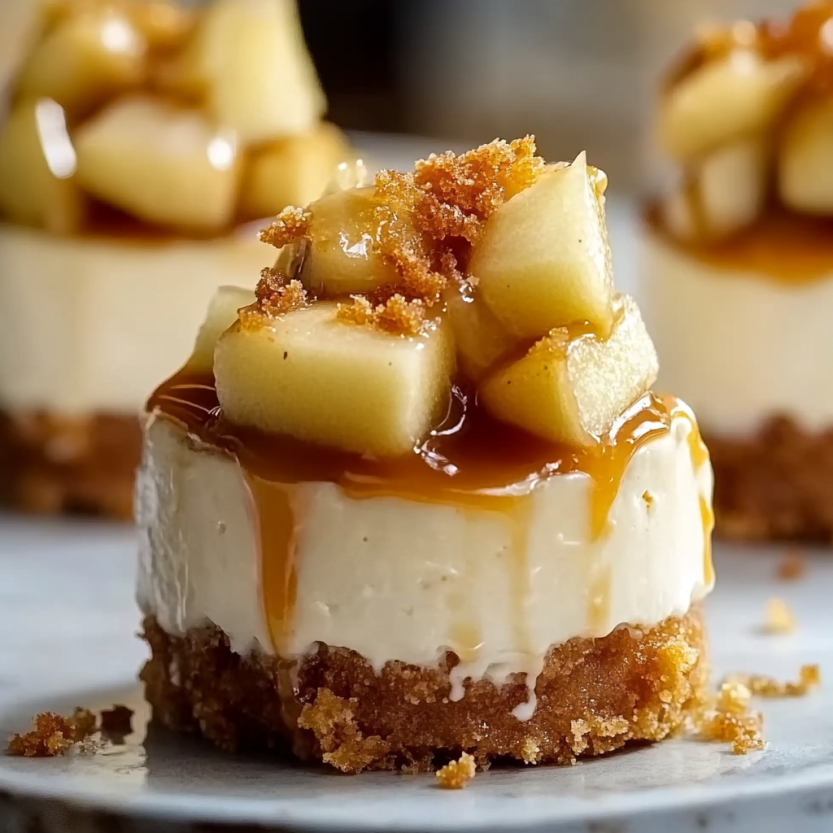
Mini caramel apple cheesecake treats pack all the coziness of autumn desserts into bite-sized fun. (They're almost too cute to eat.) Once apples are ripe, I love to whip these up for movie nights, holiday hangouts, or any excuse to share a sweet snack. Creamy centers, crumbly crust, gooey caramel, and cinnamony apples—what’s not to love?
The first time I made these was for a family birthday because I needed something super simple for a crowd. Now they’re everyone’s must-have treat when apples are in season—especially after a day of picking fresh ones.
Irresistible Ingredients
- Whipped cream: The ultimate finish on top, rich and fluffy Whip it yourself or grab a quality pre-made can
- Cinnamon: Brings that warm apple pie taste Use Saigon or Ceylon if you can for extra flavor
- Butter: Makes the sauteed apples glossy and tender Just melt a bit in the pan till everything’s golden
- Brown sugar: Adds depth and that molasses sweetness to apples Pick dark or light, whatever you like
- Caramel sauce: Pours on pure, sticky goodness Buy a thick brand or stir up your own batch
- Diced apples: Granny Smith keeps it just tart enough Use crisp, good-looking apples for texture
- Large eggs: These pull the filling together and keep it silky Use the freshest ones for best results
- Vanilla extract: Heightens the milky and apple flavors Go for pure vanilla for a bigger aroma
- Sugar: Makes the cheesecake sweet, never cloying Go for fine white sugar so it blends right in
- Cream cheese: The main event Get the blocks (not the tubs!) so your filling stays thick and dreamy
- Melted butter: Helps hold the crust together and gives a buttery taste Choose European-style if you’re feeling fancy
- Graham cracker crumbs: That classic base—crunchy and a bit sweet Use ones with real honey or smash your own
Easy Steps to Make Them
- Chill and Serve
- After they cool off, pop the cheesecake bites in the fridge for at least two hours so they set. Before you pass them around, swirl on some whipped cream and pour on extra caramel. Eat cold or let them warm up on the counter for fifteen minutes—so creamy!
- Add the Topping and Bake
- Layer the apple mixture on top of each cheesecake, then drizzle caramel sauce over that. Into the oven they go for eighteen to twenty minutes until puffed in the middle. Let everything cool right in the tray.
- Caramelize the Apples
- Put diced apples, butter, brown sugar, and cinnamon in a small pan on medium. Cook, stirring, till the apples are tender and syrupy—usually about five to seven minutes. Set them aside to cool a bit before topping.
- Make the Cheesecake Filling
- Beat cream cheese (softened), sugar, and vanilla in a big bowl until it’s all velvety. Crack in eggs one at a time, blending after each. Check for lumps. Spoon that creamy stuff over the cool crusts (about two thirds full).
- Prepare the Crust
- Get the oven going at 325 degrees F. Pop paper or silicone liners into a muffin tin. Combine graham crumbs and melted butter till well-mixed. Press a heaping tablespoon into each liner and press it down tight. Bake five minutes so it sets, then let them cool off.
 Bookmark
The sweet-tangy bite from the Granny Smiths is just awesome here. My kiddo always begs to help with the caramel drizzle, so it’s turned into our little tradition. These are just the kind of treats that spark happiness every time we make them together.
Best Ways to Store Them
They’ll last up to five days chilled in the fridge. Pop them in something airtight so they stay fresh and don’t soak up weird fridge smells. If you want to keep them longer, stick them on a baking sheet to freeze quick, then stash in a freezer zip bag. Defrost overnight in the fridge, and top with whipped cream when you’re ready to snack.
Swaps for Special Diets
You can use gluten-free graham crackers for the crust—no one will notice. Need dairy-free? Grab a good plant-based cream cheese and swap in coconut oil for butter. Want less processed sugar? Try honey or maple syrup instead.
Fun Ways to Serve
Lay them out on a cute tray for parties, or set up a DIY dessert bar with fun toppings. Sprinkle toasted pecans, some sea salt, or a dusting of cinnamon for more wow. Feeling festive? Stack them up like a little cake tower and watch folks go wild over them.
 Bookmark
Tasty Traditions and Inspiration
Caramel apples always mean fall festivals to me, but these cheesecake bites let you enjoy those flavors any time of year. I love making them to remind me of apple picking trips and family time once leaves start turning.
Frequently Asked Questions About Recipes
- → Which apples give the best flavor here?
Granny Smiths are perfect since they're tart enough to balance the sweet caramel. But honestly, any apple you love can work.
- → Can I whip these up the day before?
You sure can! Make them a couple days early and pop them in the fridge—they’ll stay great until you’re ready.
- → How can I avoid gluten in this treat?
Just swap in gluten-free graham crackers for the base. You won’t notice a difference—still tastes awesome.
- → Could I make these dairy-free or vegan?
Definitely—grab your favorite plant-based cream cheese and vegan butter. It’s an easy switch.
- → Any good swaps for caramel sauce?
If you’re feeling it, maple syrup or honey both drizzle on for a different kind of sweet kick.
- → Is chilling a must before digging in?
You’ll get the yummiest, creamiest bites if you chill first, but honestly, they’re still tasty at room temp.