
 Bookmark
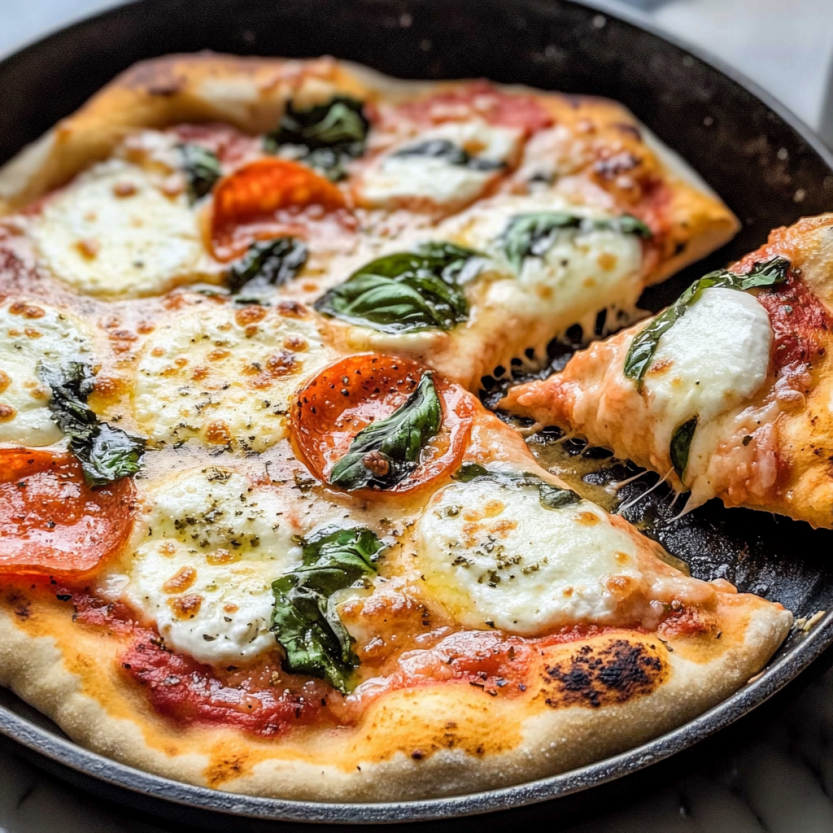
This skillet Neapolitan margherita pizza is the ultimate quick homemade pizza solution that will convince you to never order takeout again. The simple method uses a cast-iron skillet to create that perfect Neapolitan-style crust with a soft interior and crisp, blistered exterior—all in just 13 minutes from start to finish.
I discovered this method during lockdown when pizza cravings hit hard but delivery wasn't an option. After experimenting with different pans and techniques, this skillet method became our Friday night tradition that even my pizza-snob friends request when they visit.
Ingredients
- Pizza dough: 250 grams makes the perfect 8-inch pizza with ideal thickness for Neapolitan style
- Pizza sauce: just ¼ cup is the perfect amount for authentic Neapolitan balance
- Fresh mozzarella cheese: use the water-packed variety and pat dry before adding to prevent soggy crust
- Fresh basil leaves: add these just before broiling so they retain their aromatic qualities
- Cast iron skillet: the secret weapon that creates perfect crust texture through even heating
Step-by-Step Instructions
- Prepare Your Heat Sources:
- Turn your oven broiler to high setting while simultaneously heating your cast-iron skillet over medium-high heat on the stovetop. This dual heat approach is crucial for creating that authentic Neapolitan crust with charred spots on top while maintaining a perfectly cooked bottom.
- Shape Your Dough:
- Transfer your room temperature dough onto a lightly floured surface and gently press it with your fingertips working from the center outward until you form an 8-inch circle. Avoid using a rolling pin as this removes the air pockets that create that characteristic chewy texture. The dough should be about ¼-inch thick throughout.
- Add Toppings Quickly:
- Once your skillet reaches proper temperature place the shaped dough directly onto the hot surface. Working quickly spread ¼ cup of pizza sauce in concentric circles leaving a small border for the crust. Immediately arrange mozzarella slices evenly across the surface followed by fresh basil leaves. This step should take no more than 30 seconds to prevent the bottom from burning.
- Stovetop Cooking Phase:
- Allow the pizza to cook undisturbed on the stovetop for exactly 5 minutes. This crucial step cooks the bottom crust to perfection while beginning to melt the cheese. You can peek at the bottom edge by gently lifting with a spatula once around the 4-minute mark to ensure it's browning properly.
- Broiling Phase:
- Carefully transfer the entire skillet to the preheated broiler positioning it approximately 6 inches from the heating element. Broil for precisely 3 minutes watching closely as the crust will blister and char quickly. This step creates those signature Neapolitan char spots and finishes cooking the top of the pizza.
 Bookmark
The fresh basil truly makes this dish special. I discovered this one summer when my garden was overflowing with basil plants. The aroma that releases when the leaves hit the hot pizza reminds me of the pizzerias my Italian grandmother would take me to as a child—that unmistakable smell of slightly charred basil is pure nostalgia.
Dough Selection Matters
While store-bought dough works in a pinch, homemade dough elevates this pizza to spectacular heights. The ideal dough for Neapolitan style contains just flour, water, salt and a minimal amount of yeast, allowing for a slow fermentation. This slow process develops the complex flavors and creates the airy structure that gives authentic Neapolitan pizza its signature texture. If making your own dough, prepare it at least 24 hours in advance for best results.
Temperature Control Tips
The secret to mastering this recipe lies in temperature management. Your cast iron skillet should be preheated for at least 5 minutes before adding the dough. To test if it's ready, sprinkle a few drops of water—they should dance and evaporate immediately. Once under the broiler, position the skillet on the top rack but not too close to prevent burning. Every oven's broiler has different intensity levels, so the first time you make this pizza, check it every 30 seconds during the broiling phase.
Serving Suggestions
Serve this pizza immediately after removing from the broiler. Traditional Neapolitan pizza is eaten with a knife and fork in Italy, as the center tends to be soft and slightly soupy from the fresh mozzarella. For a complete meal, pair with a simple arugula salad dressed with lemon juice and olive oil to cut through the richness. A glass of light-bodied red wine like Chianti complements the tomato and basil flavors perfectly.
 Bookmark
Frequently Asked Questions About Recipes
- → Can I use store-bought pizza dough for this recipe?
Yes, you can use store-bought pizza dough, though homemade dough (especially sourdough) will provide better flavor and texture. The key is ensuring your dough is at room temperature before stretching it to fit the skillet.
- → What if I don't have a cast-iron skillet?
If you don't have a cast-iron skillet, you can use a regular oven-safe skillet and then carefully transfer the partially cooked pizza to a parchment-lined baking sheet before placing under the broiler.
- → Why is my pizza dough sticking to the skillet?
Ensure your skillet is properly heated before adding the dough, and use enough flour when stretching the dough. You can also add a light sprinkle of cornmeal to the hot skillet just before adding the dough to prevent sticking.
- → Can I add other toppings to this margherita pizza?
While traditional Neapolitan margherita pizza uses minimal toppings, you can add others like cherry tomatoes, arugula (after baking), or a drizzle of olive oil. Just avoid overloading the pizza, as this can prevent proper cooking of the crust.
- → How do I know when the pizza is done cooking?
The pizza is done when the bottom crust is browned (after about 5 minutes on the stovetop) and the top crust begins to blister and slightly char under the broiler (about 3 minutes). Keep a close eye on it under the broiler as it can burn quickly.
- → Can I prepare the dough ahead of time?
Yes, pizza dough can be prepared up to 3 days ahead and stored in the refrigerator. Just bring it to room temperature about 30 minutes before cooking for easier handling and better rise.