
 Bookmark
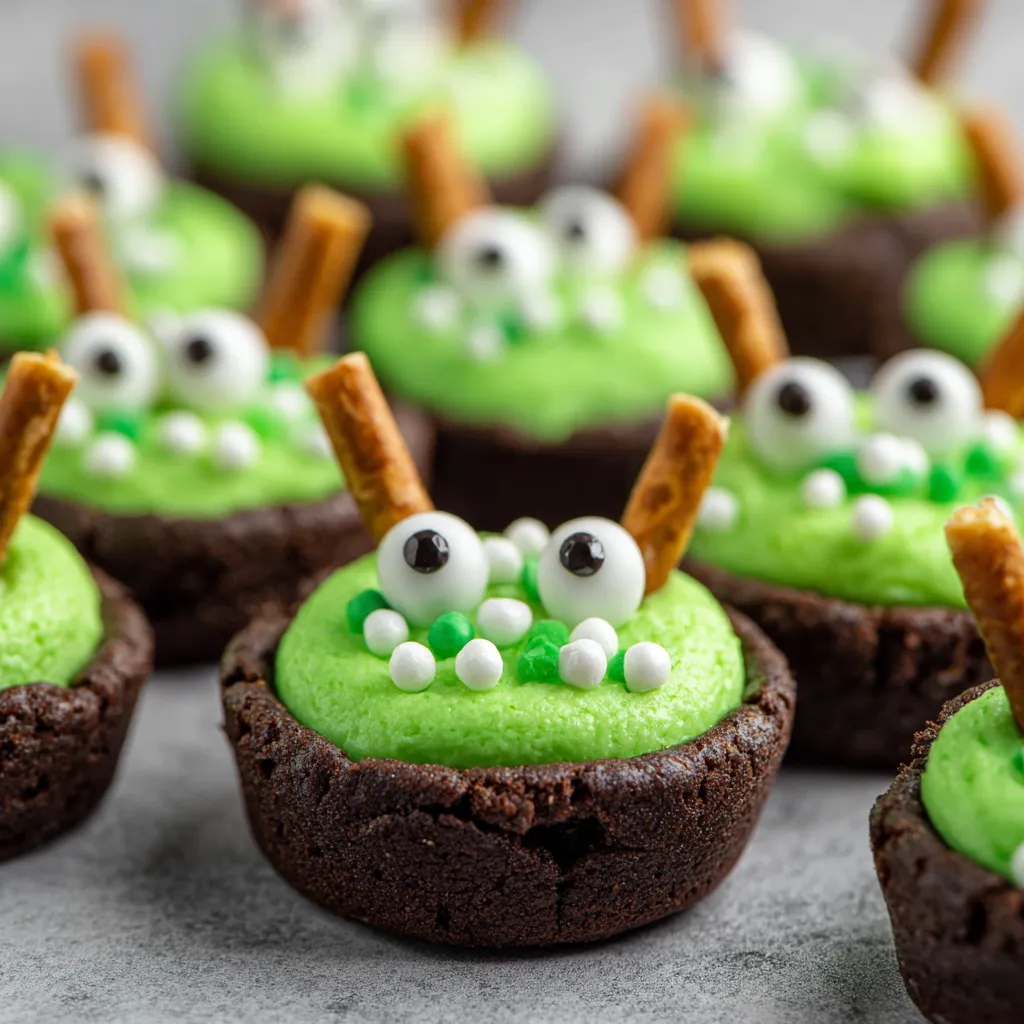
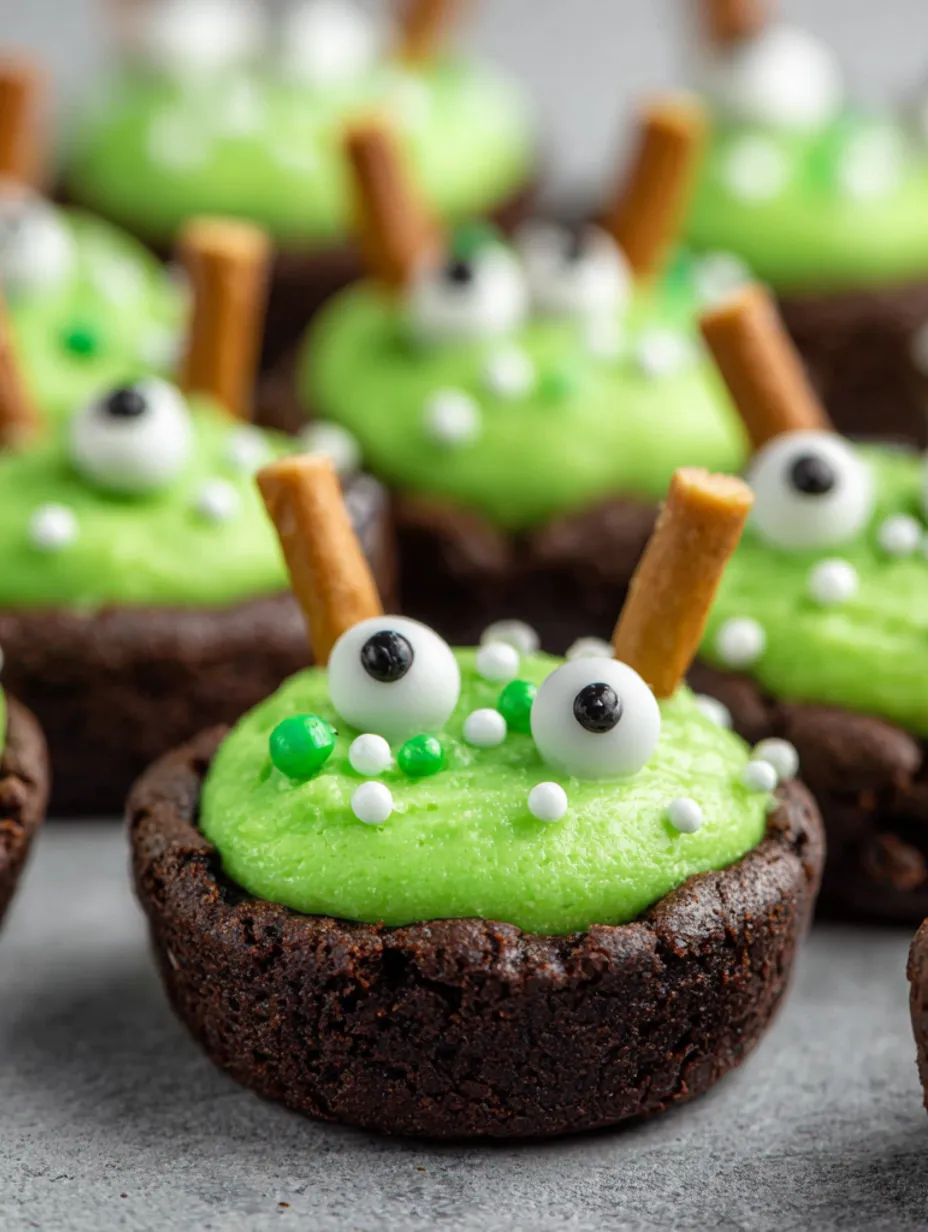
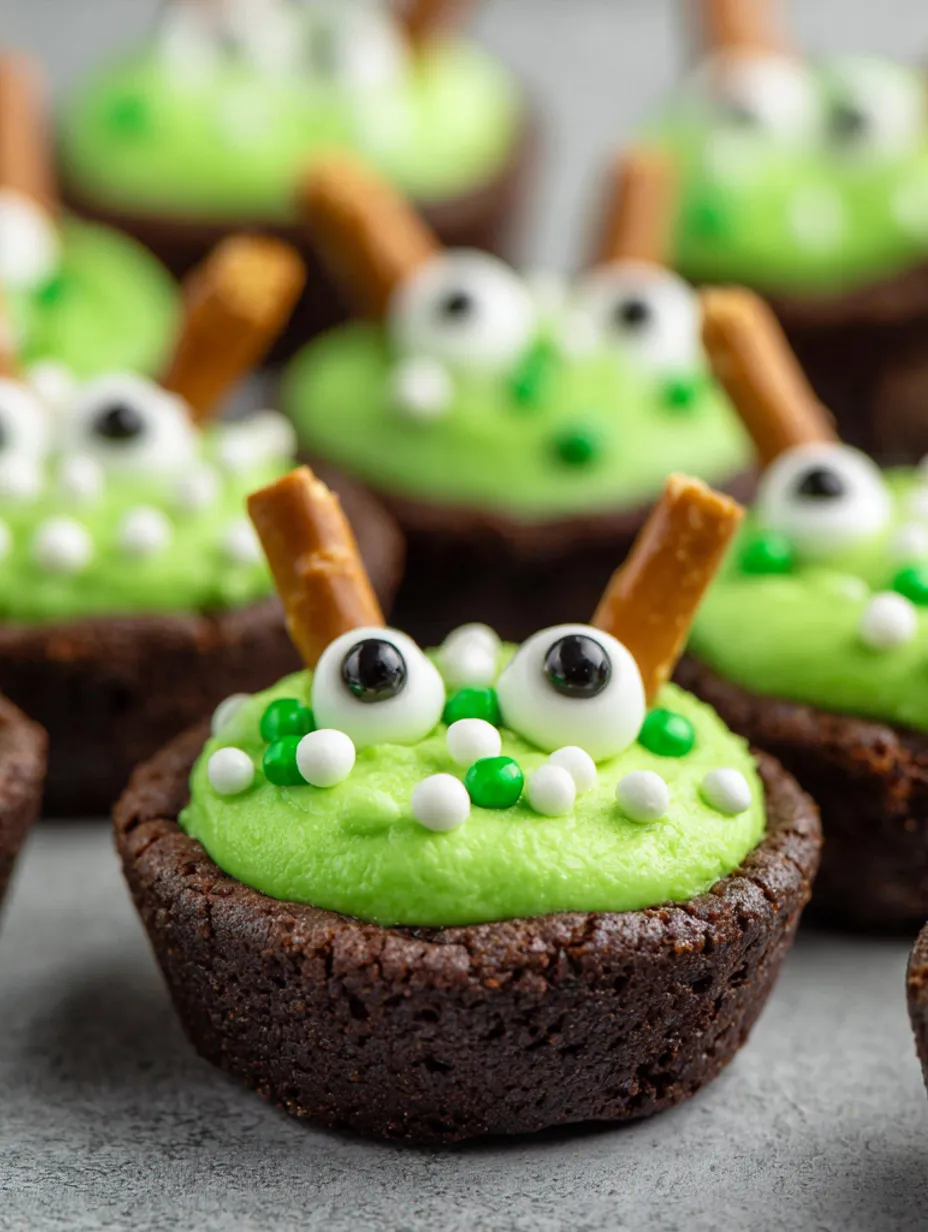
These cauldron cookies are a playful way to celebrate Halloween. Baked as chocolate cookie cups and filled with colorful buttercream, they become bubbling little cauldrons topped with sprinkles, candy eyes, and pretzel stick stirrers. They are simple to make, fun to decorate, and always a hit with both kids and adults.
I first made these with my nieces on a rainy October afternoon, and they could not stop laughing while decorating their own cauldrons. Now it has become a tradition we look forward to every year.
Ingredients
- Devil’s Food cake mix: gives a rich chocolate base that bakes into chewy cups use a fresh box for best results
- Eggs: bind the mix together and add structure ensure they are room temperature for smoother mixing
- Canola or vegetable oil: keeps the cups moist and tender choose a light oil for a clean flavor
- Black food coloring (optional): deepens the dark cauldron look use gel coloring for intensity
- Butter: creates the creamy foundation for the buttercream use unsalted and soft for easy whipping
- Powdered sugar: sweetens and stabilizes the frosting sift before adding for smooth texture
- Vanilla: balances the sweetness and rounds out the flavor pure extract gives best results
- Salt: sharpens the flavors and prevents the frosting from tasting overly sweet
- Milk: adjusts the buttercream consistency add gradually until it pipes easily
- Green food coloring: provides the potion look gel coloring holds its brightness best
- Round green sprinkles: add bubbly texture choose uniform sizes for effect
- Halloween sprinkles: add festive flair from bones to bats pick a theme that fits your party
- Candy eyeballs: give a playful spooky finish
- Pretzel sticks: mimic wooden stirrers adding both look and crunch
Step-by-Step Instructions
- Prepare the pans:
- Preheat the oven to 350°F and lightly grease three 12 cup mini muffin pans. This prevents sticking and ensures even browning.
- Mix the dough:
- Combine cake mix eggs oil and optional food coloring in a bowl. Stir until fully blended without dry patches. The dough will be thick but manageable.
- Shape and bake:
- Scoop about half a tablespoon of dough into each muffin cup. Flatten gently with your fingers to prevent doming. Bake 8 to 10 minutes until edges are set but centers still soft.
- Indent and cool:
- While warm press a one tablespoon measuring spoon into the center of each cookie to form a well. Allow them to cool in the pan before transferring to a rack.
- Make the buttercream:
- Beat softened butter until fluffy. Gradually add powdered sugar vanilla and salt. Add milk one tablespoon at a time until smooth and pipeable. Tint with green coloring until you reach the shade you like.
- Fill and decorate:
- Pipe the green buttercream into the cooled cups filling them to look like bubbling potion. Top with sprinkles candy eyes and broken pretzel sticks for a playful cauldron look.
 Bookmark
The buttercream is my favorite part because it carries the decorations beautifully. I still remember my son proudly showing off his cauldron with three candy eyeballs as if he had brewed his own monster potion.
Storage Tips
Keep decorated cookies in an airtight container for up to four days. Store in the fridge for a week or freeze the undecorated cookie cups for three months. Thaw at room temperature before decorating.
Ingredient Substitutions
Try a brownie base instead of cake mix for a fudgier result. Swap buttercream with cream cheese frosting for tang or use white chocolate ganache tinted green for extra richness.
Serving Suggestions
Arrange the cauldrons on a dark tray scattered with candy corn or gummy worms. They make a perfect centerpiece for a Halloween dessert table. Pair with hot cocoa or cider for a cozy party spread.
 Bookmark
Cultural Context
Cauldrons have long been linked with witchcraft in folklore making them a natural Halloween symbol. Turning them into edible treats is a playful nod to that tradition while still keeping the mood lighthearted and fun.
Frequently Asked Questions About Recipes
- → Can I use a different cake mix flavor?
Yes, you can substitute with other cake mix flavors like vanilla or red velvet, depending on your preference.
- → How far in advance can I make these cookies?
The cookie cups can be baked up to three days ahead and stored in an airtight container. Decorate just before serving for the best look.
- → Can I freeze the cookie cups?
Yes, the undecorated cookie cups freeze well for up to three months. Thaw completely before filling and decorating.
- → What type of frosting works best?
Buttercream is classic, but you can also use cream cheese frosting, canned frosting, or even a white chocolate ganache for variation.
- → How do I keep the decorations from melting?
Allow the cookie cups to cool fully before adding frosting and decorations. This ensures the buttercream holds its shape and sprinkles stay in place.
- → Can kids help with the decorating?
Absolutely! Kids will enjoy adding the sprinkles, candy eyeballs, and pretzel sticks to create their own spooky cauldrons.