
 Bookmark
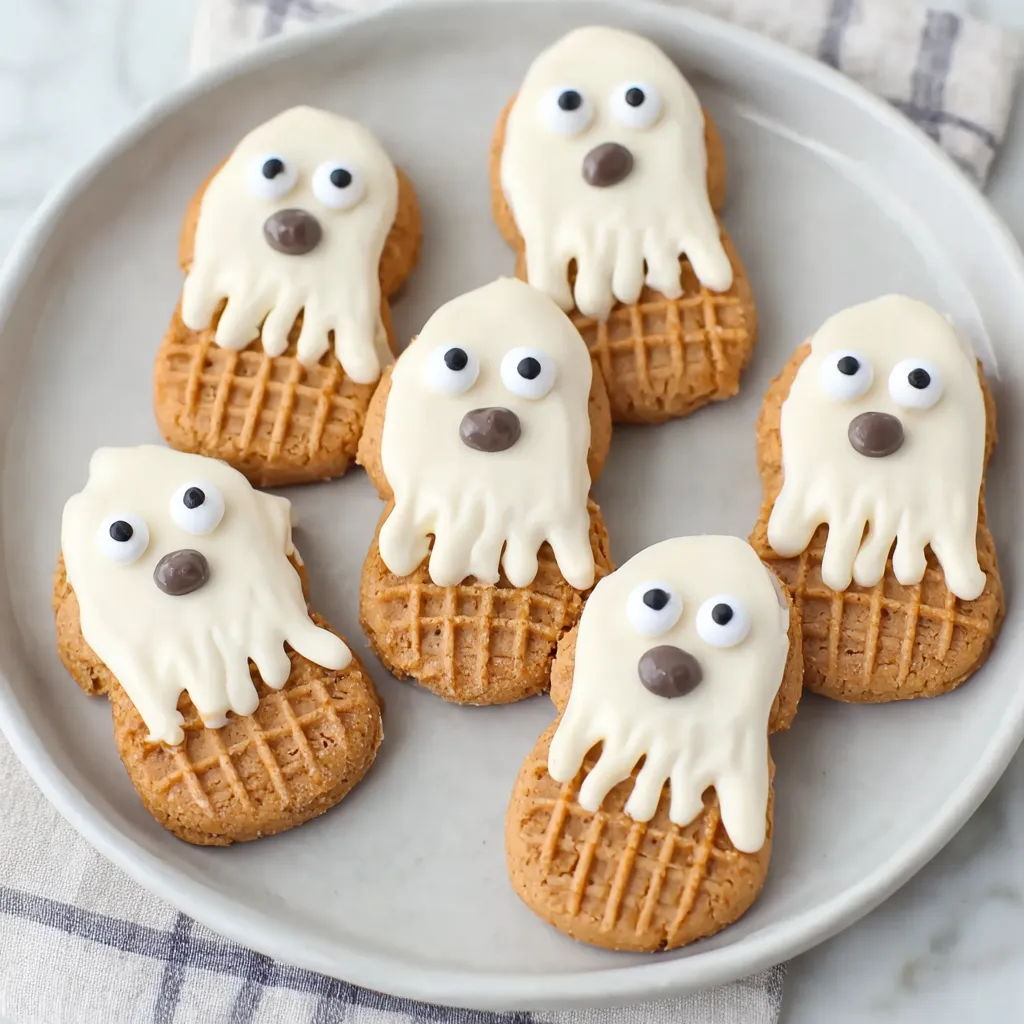
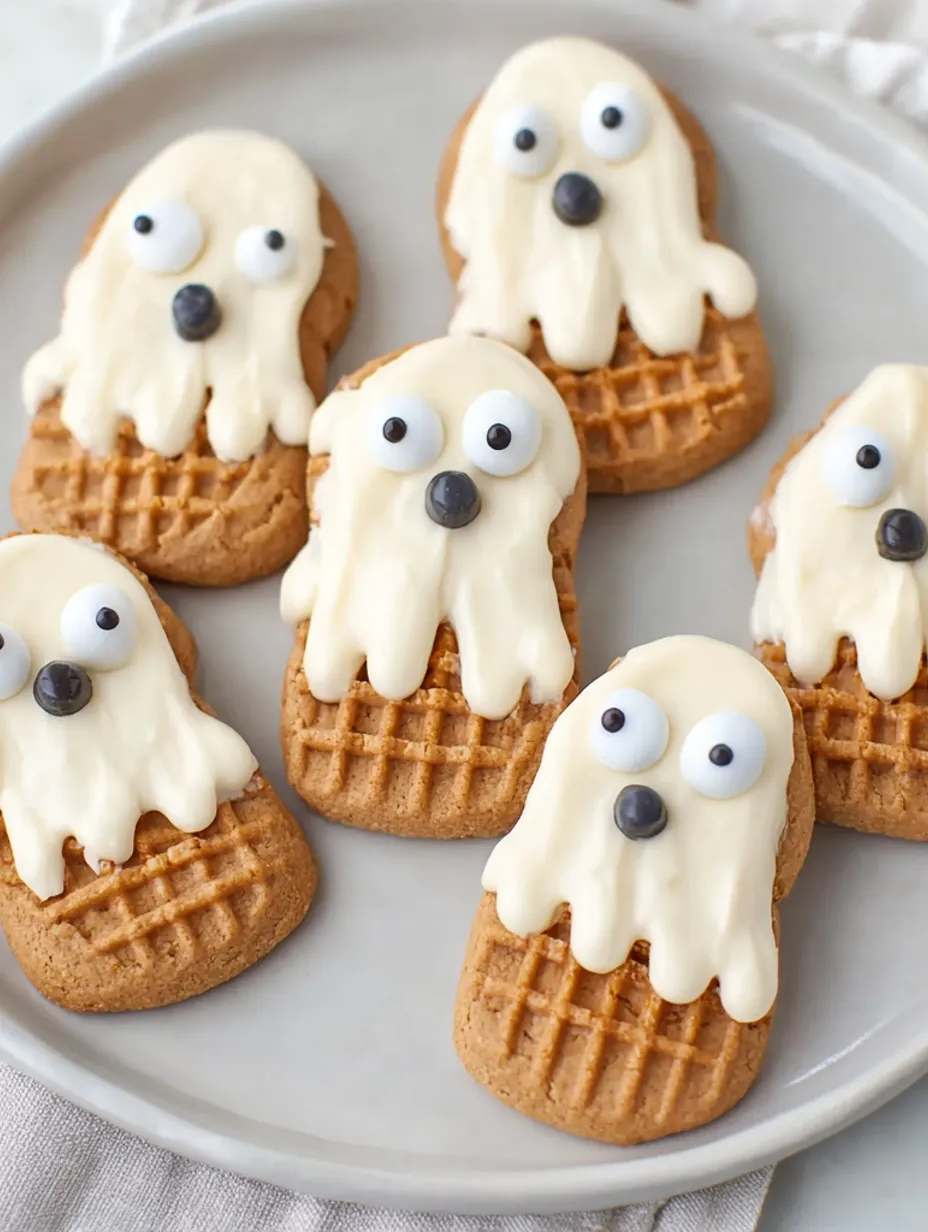
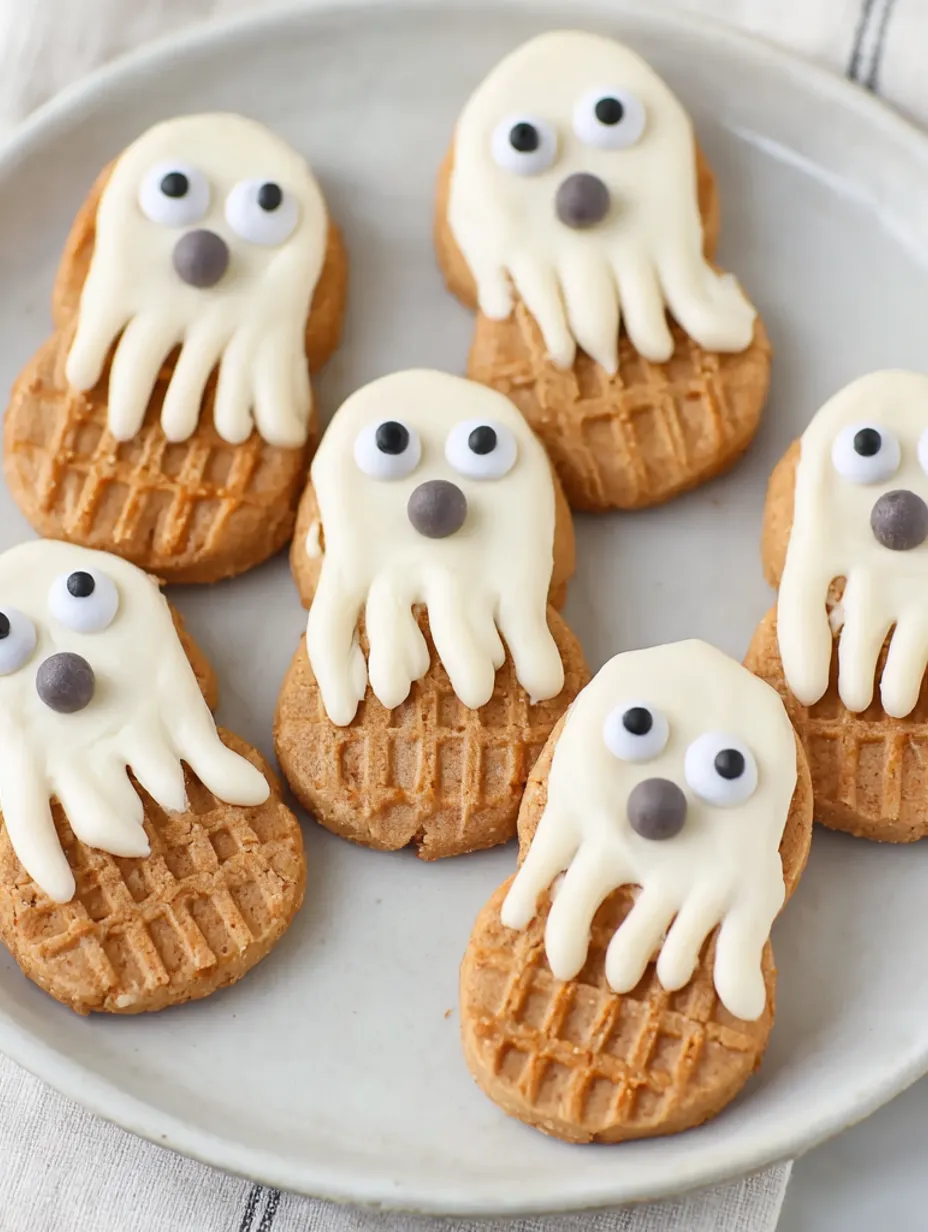
These adorable ghost cookies have become my go to Halloween treat when I need something quick but impressive. Using just four simple ingredients, you can transform ordinary peanut butter cookies into spooky sweet decorations that kids absolutely love making. I discovered this trick three years ago when scrambling for last minute party treats, and now my daughter asks to make them every October.
The first time I made these was during a frantic afternoon before my son's classroom Halloween party. What started as desperation turned into our new family tradition. Now we make them together every year, and the kids have gotten so creative with different facial expressions.
Ingredients
- 12 ounces white candy melts: creates the perfect ghost coating that sets smoothly without tempering chocolate
- 18 Nutter Butter cookies: provide the ideal peanut shaped base that resembles ghost bodies
- 32 candy eyes: give each ghost personality and are much easier than piping eyes
- 18 mini chocolate chips: create simple mouths that stay put once the coating hardens
Step by Step Instructions
- Melt the Coating:
- Place white candy melts in a microwave safe bowl and heat in 30 second intervals, stirring thoroughly between each heating. Continue this process until the chocolate becomes completely smooth and flows easily off your spoon. This gentle heating prevents seizing and creates the perfect dipping consistency.
- Dip Each Cookie:
- Hold each Nutter Butter cookie at the top and dip approximately three quarters of the cookie into the melted candy coating. Gently tap the cookie against the side of the bowl to remove excess coating, then place on parchment paper. The undipped portion becomes the ghost's "head" area.
- Add Facial Features:
- Working quickly in small batches of 3 to 4 cookies, press two candy eyes onto each cookie while the coating is still wet. Position them in the upper portion of the dipped area. Add one mini chocolate chip below the eyes to create a mouth. Work fast because the coating sets within 2 to 3 minutes.
- Set and Store:
- Allow the chocolate coating to completely harden at room temperature for about 15 minutes. Once set, the cookies can be served immediately or stored in an airtight container with parchment paper between layers.
 Bookmark
My favorite part about these cookies is watching kids' faces light up when they see the finished ghosts. The candy eyes give each one such personality, and no two ever look exactly alike. I always make extra because they disappear so quickly at parties.
Storage and Freshness
These ghost cookies maintain their quality for up to one week when stored properly at room temperature. Place them in an airtight container with parchment paper separating each layer to prevent the decorations from sticking together. The candy coating actually helps preserve the cookies underneath, making them last longer than regular decorated treats.
Creative Variations
Transform these basic ghosts into lollipop treats by gently pressing wooden sticks into the cream filling before dipping. For mummy cookies, dip the entire cookie in white coating, add candy eyes, then drizzle additional melted chocolate in crisscross patterns using a piping bag or plastic storage bag with a corner snipped off. You can also create different expressions using various sized chocolate chips or dots of black decorating gel.
Ingredient Substitutions
White chocolate chips work in place of candy melts, though they require more careful melting and may not set as firmly. Almond bark offers another excellent alternative that melts smoothly and hardens well. For the decorations, black decorating gel can replace candy eyes, and different sizes of chocolate chips create varied mouth expressions from surprised to sleepy.
 Bookmark
Frequently Asked Questions About Recipes
- → How long do these ghost cookies stay fresh?
Store the cookies in an airtight container at room temperature for up to one week. If stacking, place parchment paper between layers to prevent sticking.
- → Can I use white chocolate chips instead of candy melts?
Yes, white chocolate chips work as a substitute, though candy melts or almond bark tend to be easier to work with and create a smoother coating.
- → What can I use instead of candy eyes?
You can substitute candy eyes with black decorating frosting, mini chocolate chips, or even small dots of melted dark chocolate applied with a toothpick.
- → How do I prevent the chocolate from being too thick?
Heat candy melts in 30-second intervals, stirring between each heating. This prevents overheating and ensures a smooth, dippable consistency.
- → Can I make these into lollipop treats?
Absolutely! Insert lollipop sticks into the cream filling at the bottom of each cookie before dipping. Add a small amount of melted chocolate around the stick for extra security.
- → How many cookies does this make?
This batch makes 18 ghost cookies using one package of Nutter Butter cookies and 12 ounces of white candy melts.