
 Bookmark
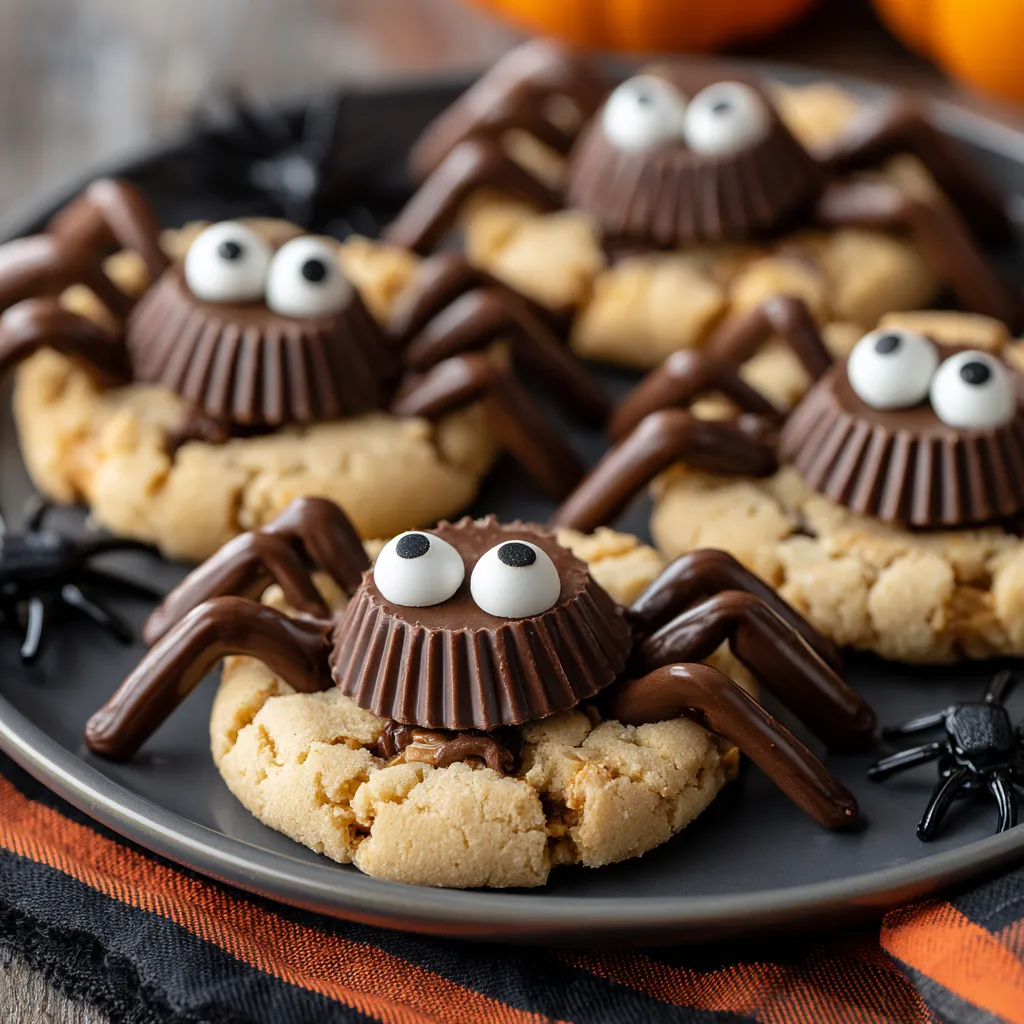
Soft and chewy peanut butter spider cookies are the ultimate Halloween treat that combines fun, flavor, and a bit of spooky charm. With a creamy peanut butter base, a chocolatey Reese’s center, and playful candy eyes, these cookies are perfect for parties, trick-or-treat boxes, or simply bringing some seasonal joy to your table.
I first baked these for a Halloween get-together with friends, and they disappeared faster than any other dessert on the table. They’ve been a seasonal tradition ever since.
Ingredients
- Unsalted butter: at room temperature gives a rich base for the cookies
- Brown sugar: adds depth with a light molasses note
- Granulated sugar: balances the sweetness and helps with rolling the dough
- Creamy peanut butter: skip natural versions for best texture
- Large egg: binds the dough together for soft cookies
- Vanilla extract: deepens the cookie flavor
- All purpose flour: the structure of the dough
- Baking soda and baking powder: ensure proper rise and softness
- Salt: balances the sweetness and enhances peanut butter
- Granulated sugar for rolling: gives a light sparkle and crisp edge
- Mini Reese’s Peanut Butter Cups: the chocolatey spider bodies
- Semi sweet chocolate chips: melted to form the spider legs
- Candy eyeballs: add the playful finishing touch
Step by Step Instructions
- Chill the Reese’s:
- Unwrap 24 mini peanut butter cups and place them in the freezer while you prepare the dough. This keeps them firm when placed onto the hot cookies.
- Beat the Butter and Sugars:
- Using a mixer beat butter brown sugar and granulated sugar together until creamy and fluffy. This step helps the cookies turn out light rather than dense.
- Add Peanut Butter Egg and Vanilla:
- Blend in the peanut butter followed by the egg and vanilla until the mixture is smooth and uniform.
- Mix Dry Ingredients:
- In a separate bowl combine flour baking soda baking powder and salt then add gradually to the wet mixture until just combined. Do not overmix or the cookies can turn tough.
- Form and Bake:
- Scoop tablespoon sized portions roll into smooth balls and coat lightly in granulated sugar. Arrange on a lined baking sheet and bake at 350F for 8 to 11 minutes until just set with slight cracks on the edges.
- Add Reese’s Center:
- Press one frozen mini Reese’s gently into the center of each cookie while still warm. Let them rest on the baking sheet for at least 15 minutes so they firm up.
- Create Spider Legs:
- Melt chocolate chips in short bursts in the microwave stirring until smooth. Transfer to a piping bag or squeeze bottle and draw four legs on each side of the Reese’s.
- Attach Candy Eyes:
- Use a tiny dab of melted chocolate to stick candy eyeballs onto each Reese’s. Allow to set completely before serving or storing.
 Bookmark
My favorite part is watching kids see the cookies for the first time Their excitement makes the little extra step of piping chocolate legs totally worth it
Storage Tips
Keep cookies in an airtight container at room temperature for up to three days. If stacking place parchment between layers to prevent smudging the chocolate. For longer storage freeze fully cooled cookies in a sealed container for up to three months.
Ingredient Substitutions
You can swap mini peanut butter cups with chocolate truffles or similar candies. If candy eyes are unavailable use small white chocolate chips dotted with melted chocolate for pupils.
Serving Suggestions
Arrange these spider cookies on a Halloween dessert table alongside other themed treats. They also make a perfect edible gift when wrapped in small boxes for neighbors or school parties.
 Bookmark
Cultural Fun
These cookies are a playful twist on peanut butter blossoms a classic American cookie usually topped with a Hershey’s Kiss. By adding chocolate legs and eyes they transform into a festive treat rooted in the joy of Halloween traditions.
Frequently Asked Questions About Recipes
- → Can I use natural peanut butter?
It’s best to use regular creamy peanut butter, as natural varieties can make the dough too oily and affect texture.
- → How do I stop the Reese’s from melting?
Freeze the mini Reese’s cups before baking so they hold their shape when pressed into the warm cookies.
- → Can I make these cookies ahead of time?
Yes, they can be made a day or two ahead and stored in an airtight container at room temperature.
- → How long will the cookies stay fresh?
They stay fresh for up to 3 days at room temperature or up to 3 months if frozen.
- → What can I use instead of candy eyes?
You can use small dots of white and dark chocolate or even mini chocolate chips as eyes.
- → Do I need special equipment to make the spider legs?
No, you can use a small piping bag, a squeeze bottle, or even a plastic bag with a tiny corner cut off.